My 2023 Jeanneau Sun Odyssey 410 came with the Raymarine Navigation package. It has wind speed, wind direction, speed through the water, GPS, water temperature, and depth, all provided with Raymarine instruments and sensors. It also has the sail computer so it’s able to calculate VMG, True Wind Speed, True Wind Angle, Polars, and other valuable information for us sailors.
The boat also came with this LCD display.
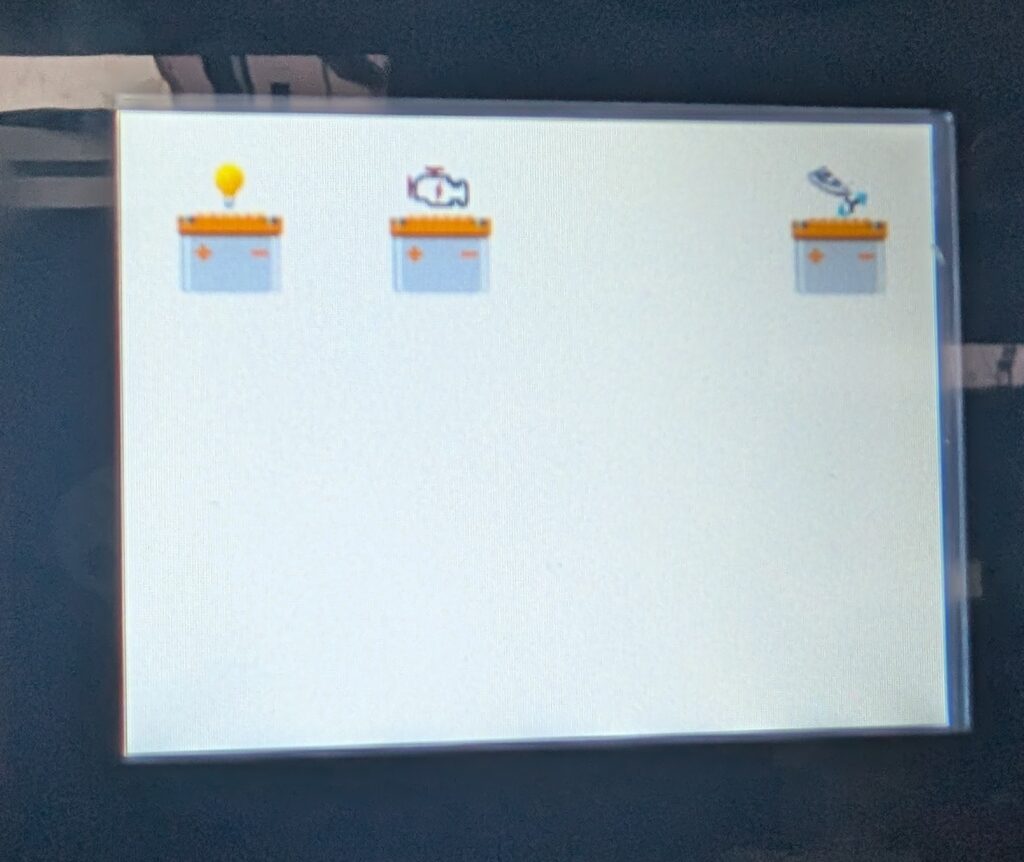
This is the Scheiber Navicolor. It uses its own network to communicate with the battery and tank sensors. You can see the orange cable here.
I had two few goals in this project.
- Integrate the Scheiber network into the SeaTalk NG network, so that I could see battery levels and tank levels from the Raymarine in the cockpit
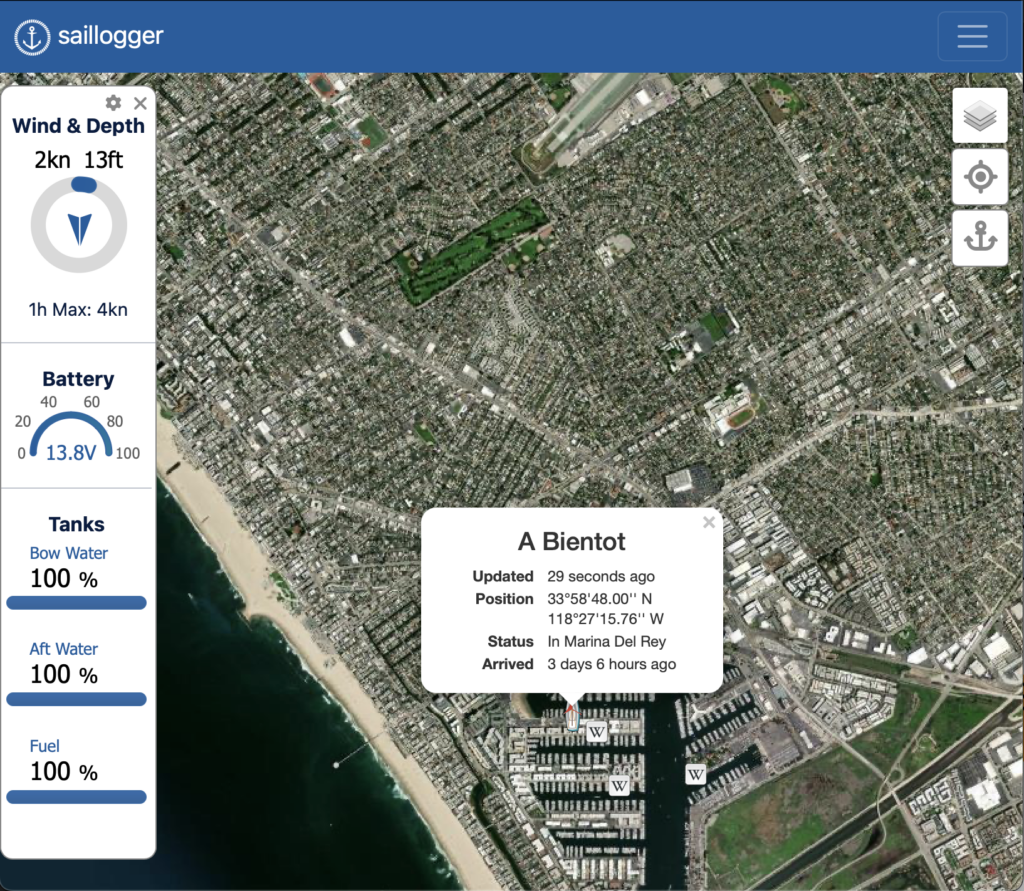
- Send monitoring data to the internet, so I could see relevant boat information from home. I wanted to see wind speed, battery levels, and tank levels, all from my home.
As the headline photo shows, I’ve succeeded.
There are a few parts to making this all work together.
Connect the Scheiber network to the SeaTalk NG network.
The Navicolor display (in the photo above) contains the software that controls the entire network, including the gateway. If yours is running an older version, like mine was, you’ll need to have it upgraded. If you dig around in the unlocked screens on the Navicolor, you can see the version number and model number.
If you have the display NAVICOLOR GT 41.68018.XX, the version must be above or equal at 8.20.00
If you have the display NAVICOLOR GT2 41.68019.XX, the version must be above or equal at 8.09.01
The Navicolor display is not upgradable by the user. I sent mine off to the US distributor for Scheiber, MarineBeam, in North Carolina, and they upgraded it for me.
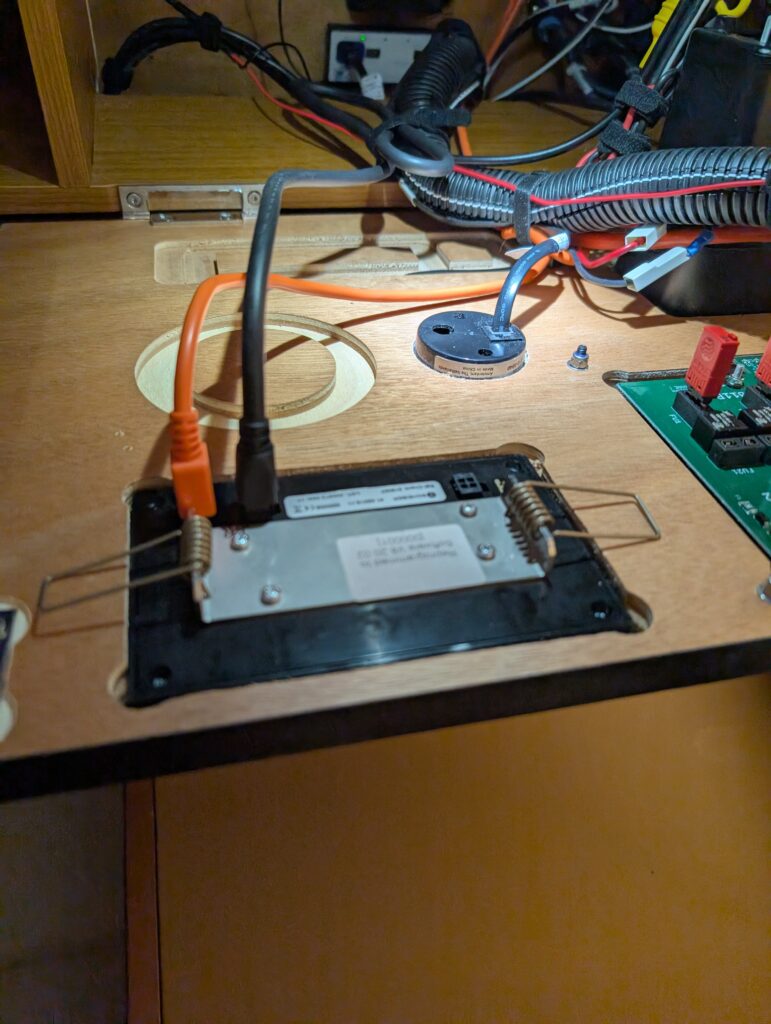
This is the back of the Navicolor display. The orange cable connects it to the existing Scheiber CAN network. There was a terminating plug in the other connector.
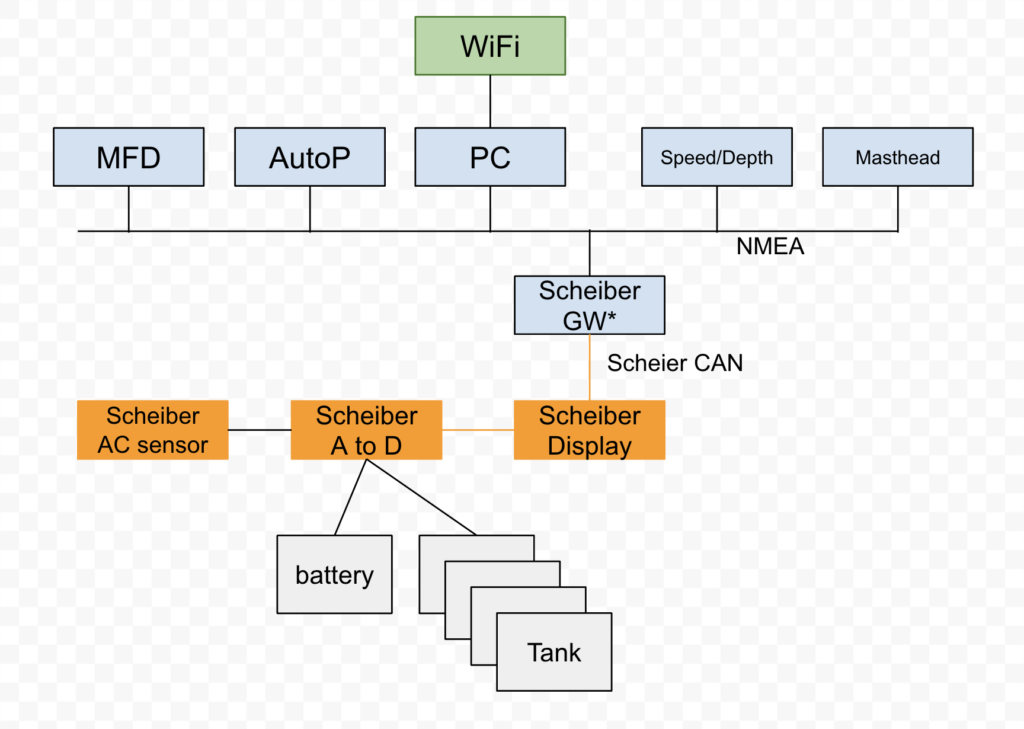
You’ll also need a “Scheiber CAN to NMEA gateway”. The gateway is a small box that bridges between the Scheiber network and the Seatalk NG NMEA network on the boat. This publishes the battery and tank data to the NMEA network. You can buy this from MarineBeam as well.
You’ll need a one-meter Scheiber CAN connecting cable to connect the display to the gateway, which you can get from MarineBeam, and a one-meter NMEA 2000 Female to SeaTalk NG cable. This adapter cable is readily available.
You’ll remove the terminating resistor from the back of the Navicolor Display, and use the Scheiber CAN cable to connect it to the gateway. Set the small right-hand DIP switch on the gateway to OFF-ON to make the gateway the termination of the Scheiber CAN network.
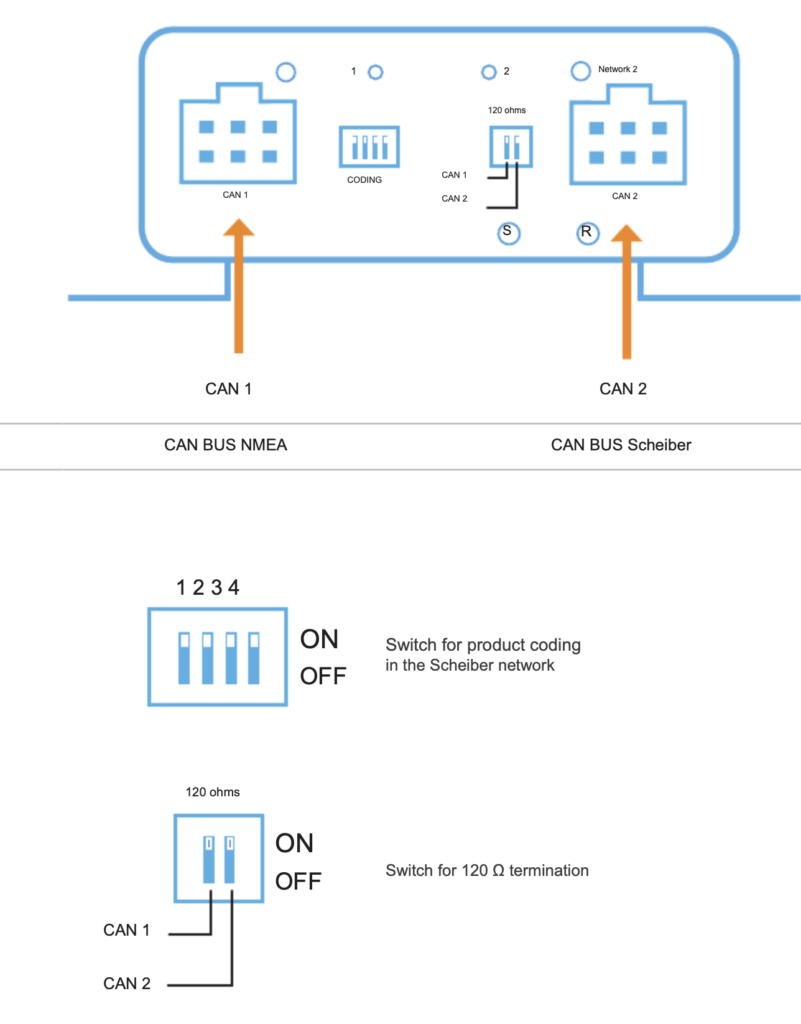
The switch labeled CAN 1 is for the NMEA network. On a NMEA network, this device is on a DROP cable, so it must not have the 120 ohm resistor. Make sure the CAN 1 switch is OFF.
The switch labeled CAN 2 is for the Scheiber CAN network. Since gateway is the termination of the CAN network, set the CAN 2 switch to ON.
You’ll get a small pigtail adapter with the gateway. Plug that into the left-hand connector on the gateway, and use your NMEA 2000 Female to SeaTalk NG cable to plug the gateway into an unused port on one of the 5 way connectors behind the instrument and breaker panel.
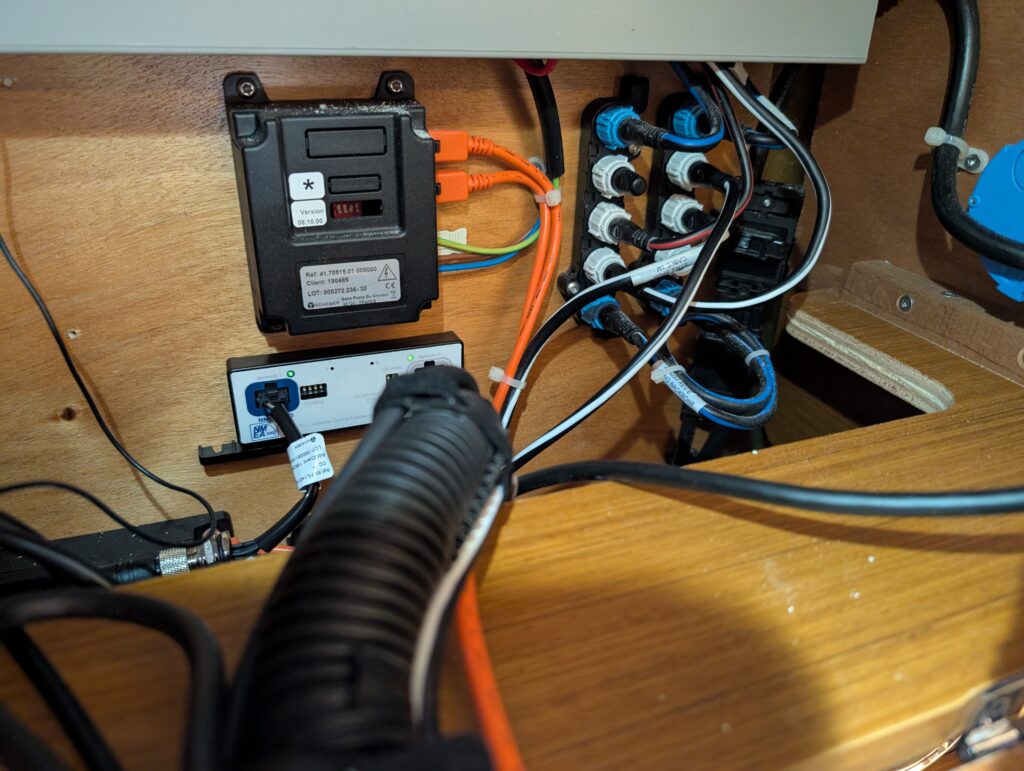
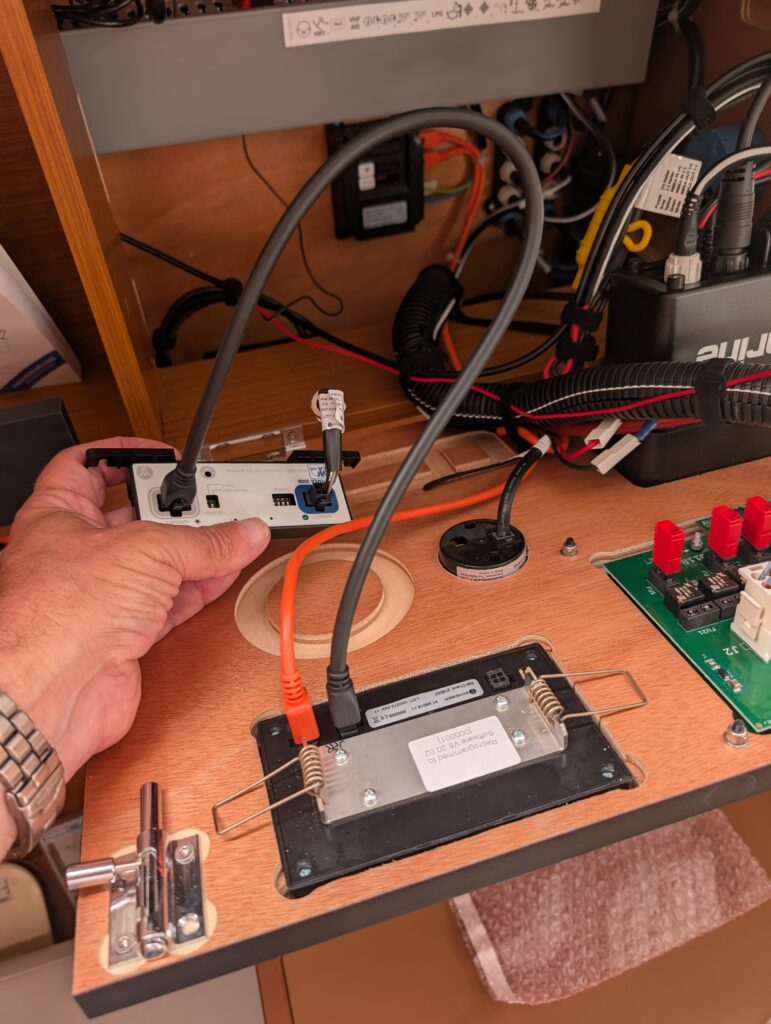
The Scheiber CAN-BUS to NMEA Gateway is the white box below the back box. There is a one meter cable to the back of the Navicolor display, and another one meter cable to the Seatalk NG network.
Publish Boat Data to the Internet
I made a panel out of marine plywood and stained it, and installed it in the aft garage closet to give myself some more room. I also replaced the existing T-Piece connected to the Sail Computer with a SeaTalk NG 5 way connector
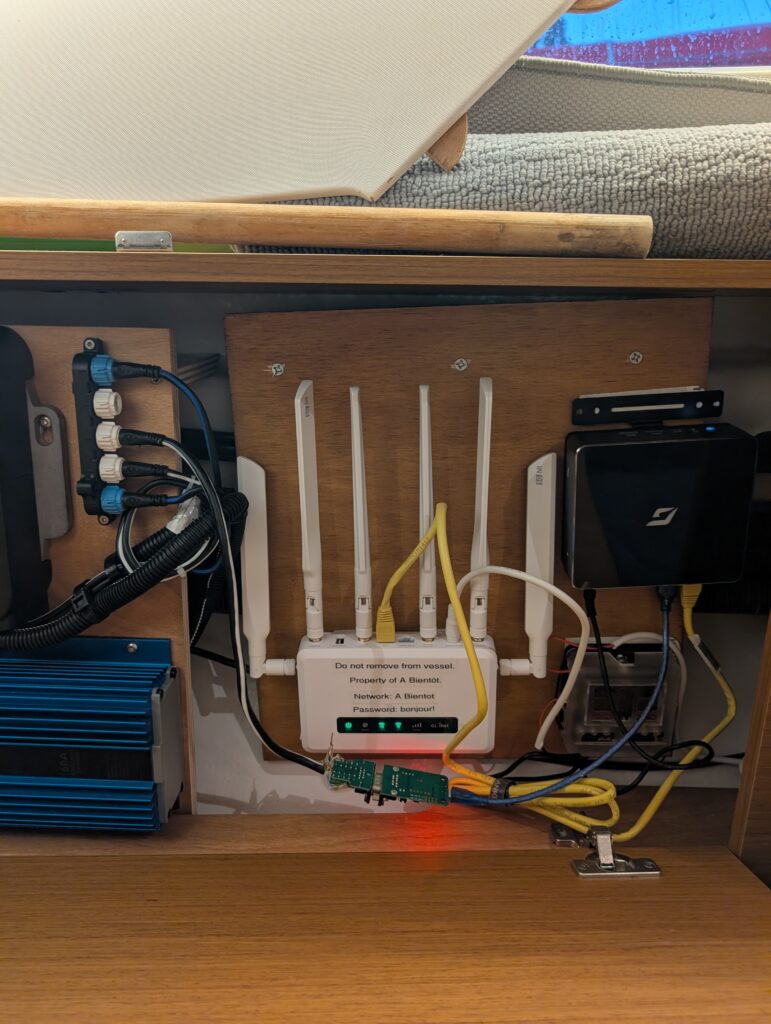
so I would have an additional SeaTalk NG drop connector. You can see it on the left in this photo, which also shows the router (white) and the PC (black). Yes, I need to do some cable management.
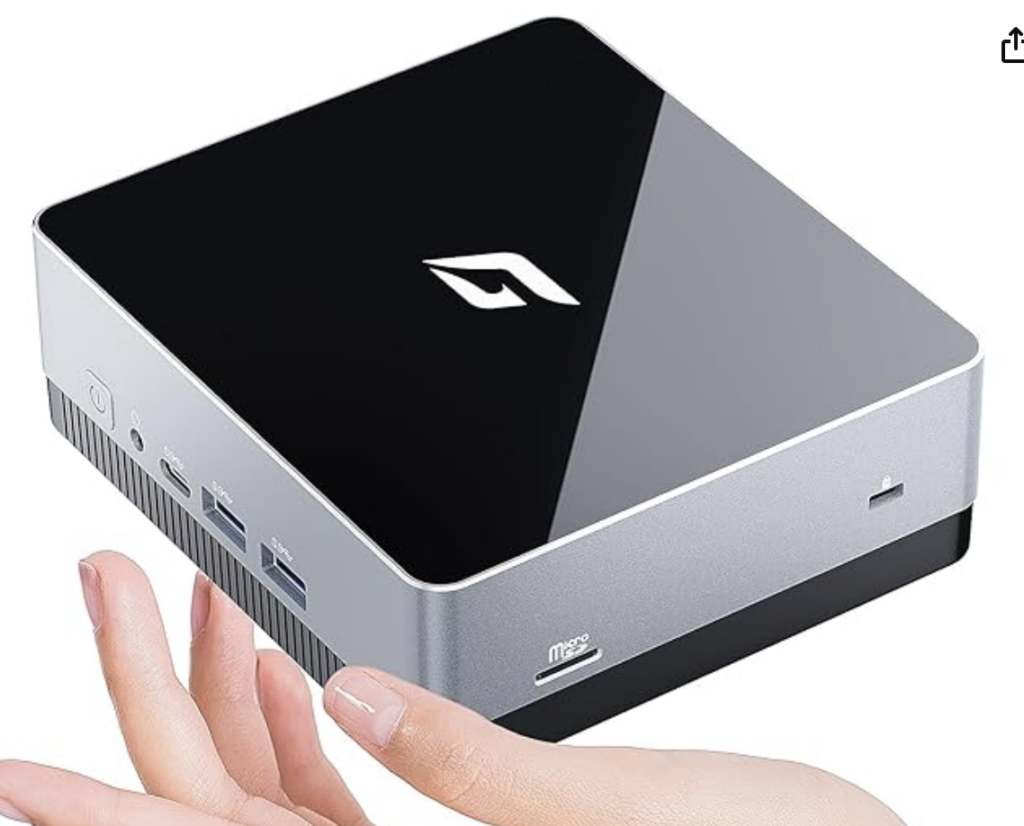
I added a small PC from Amazon. This one comes with a 120v to 12v external power supply. I cut the cord off the power supply and connected the computer to a new fuse box that I wired back to the instrument panel behind the hanging locker in the garage. I also used a cheap CAN BUS analyzer and wired it between the SeaTalk NG connector and a USB port. There are other ways of getting SeaTalk NG data to a PC, such as this WiFi gateway or this USB gateway.
The PC is running signalk, which basically allows you to do any kind of processing you want on NMEA 2000 data. In my case, that’s running the saillogger plugin (see below).
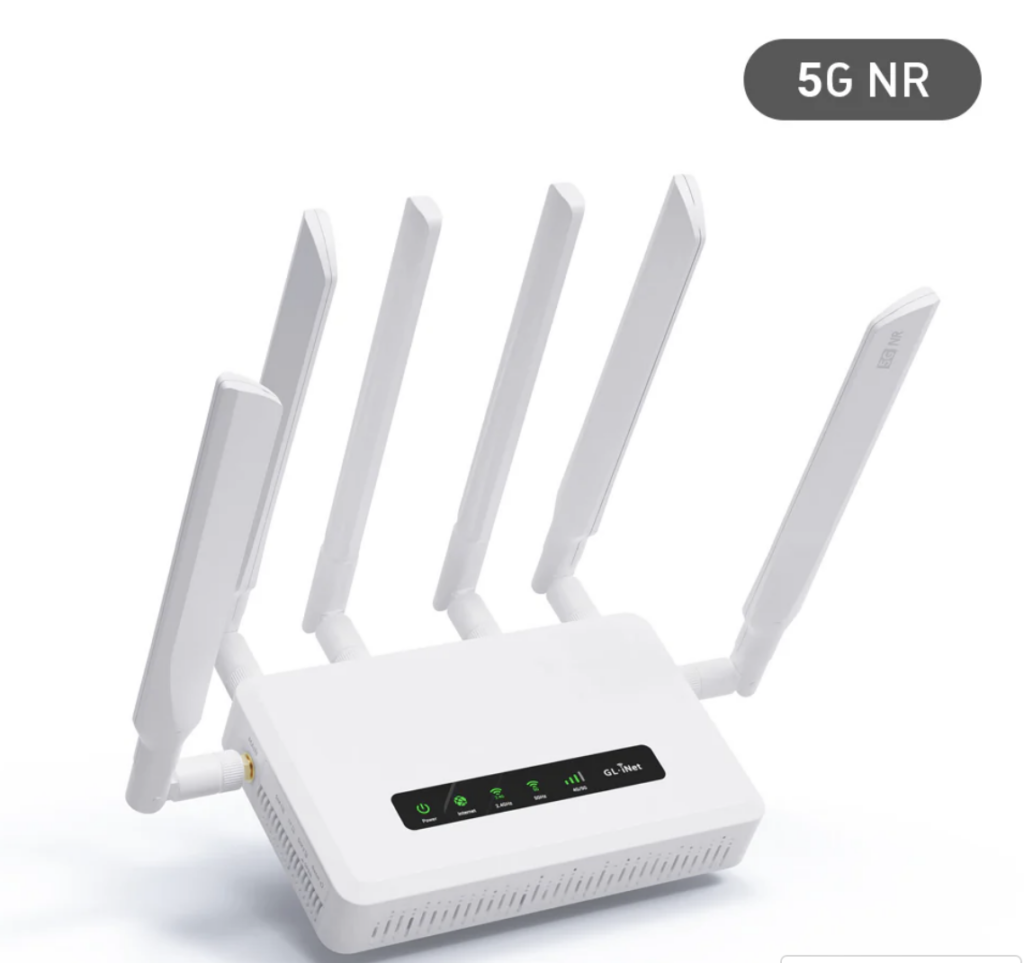
Next to the PC is a small wifi hotspot. It has 2 SIM card slots, and can automatically fail over if the primary SIM card doesn’t have service. The hotspot also had a 12v external power supply, so it’s connected to the fuse box as well
You’ll need an account at saillogger.com (sponsored link). You’ll set up an account, and they’ll generate a code for your boat.
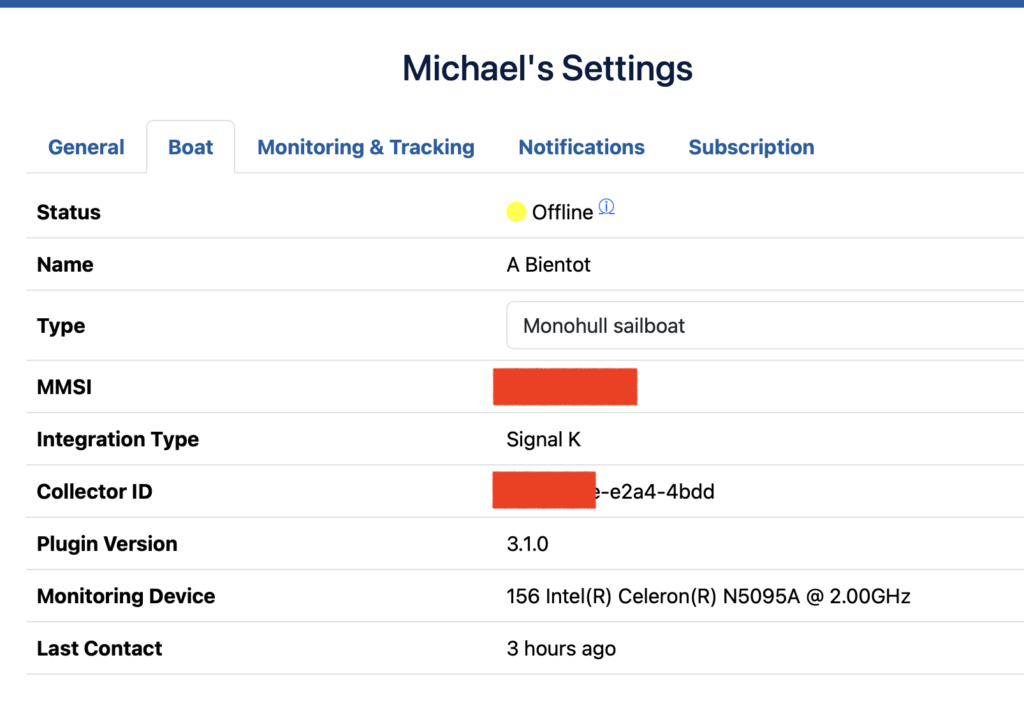
In this case, my collector ID is the sequence ending with 4bdd.
Once you set up SignalK and log in, you’ll install the saillogger plugin from the signalk appstore:
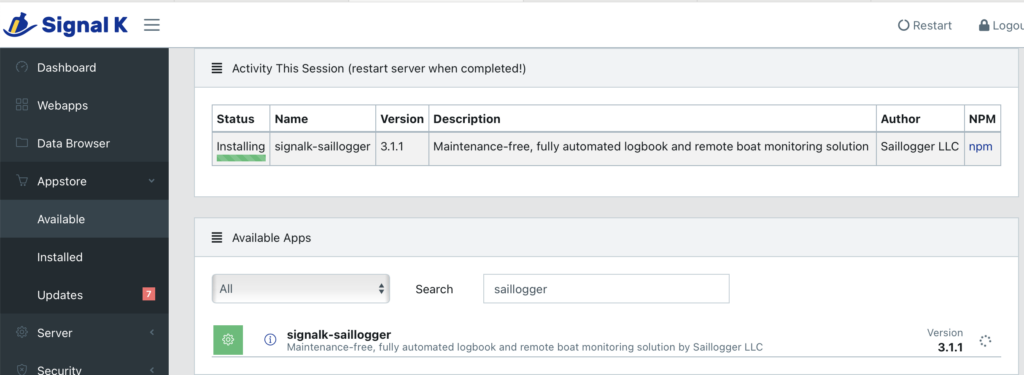
Restart the server, log back in, go to Server > Plugin Config, and paste in the Collector ID, and hit Submit.
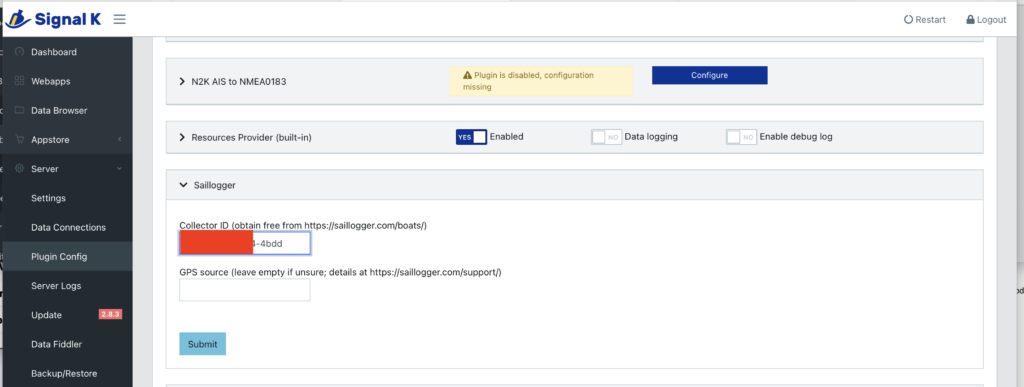
Data will flow from the boat’s SeaTalk NG network to the PC, into SignalK, and then gets uploaded via the wifi hotspot to the internet.
You can choose to adjust which data elements you want to track, and what they’re named. All of that configuration data is done from the saillogger.com site.
On my boat, I have monitoring configured like this.
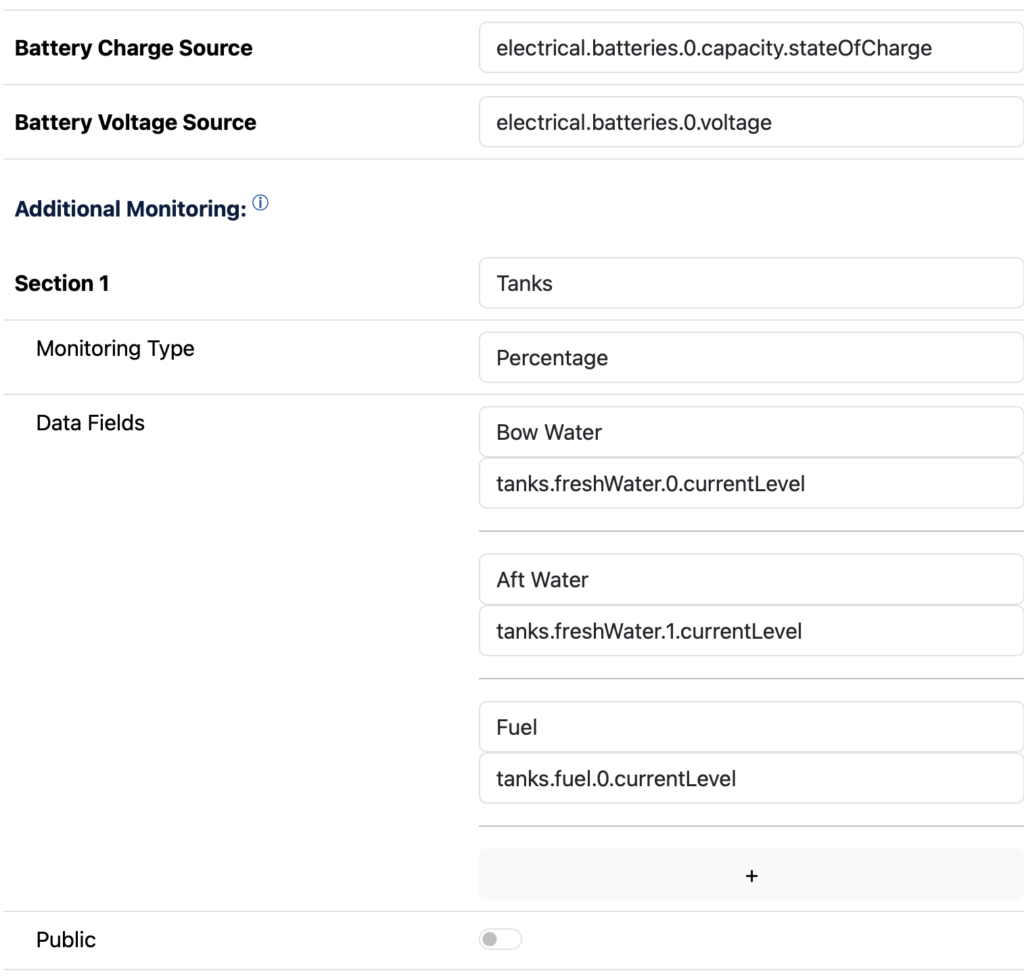
I have a total of 6 batteries on the boat: 4 house batteries in bank 1, 1 starter battery in bank 2, and a bow thruster battery in bank 3.
Batteries:
- House batteries:
electrical.batteries.0. - Engine starter battery:
electrical.batteries.2 - Thruster battery:
electrical.batteries.4
When you change these settings on saillogger.com, it sends a configuration command back to your boat via the internet back to the SignalK server, which processes the configuration and starts sending the new data back to sailloger.com, The whole process takes about a minute and a half.
It’s pretty magical.
